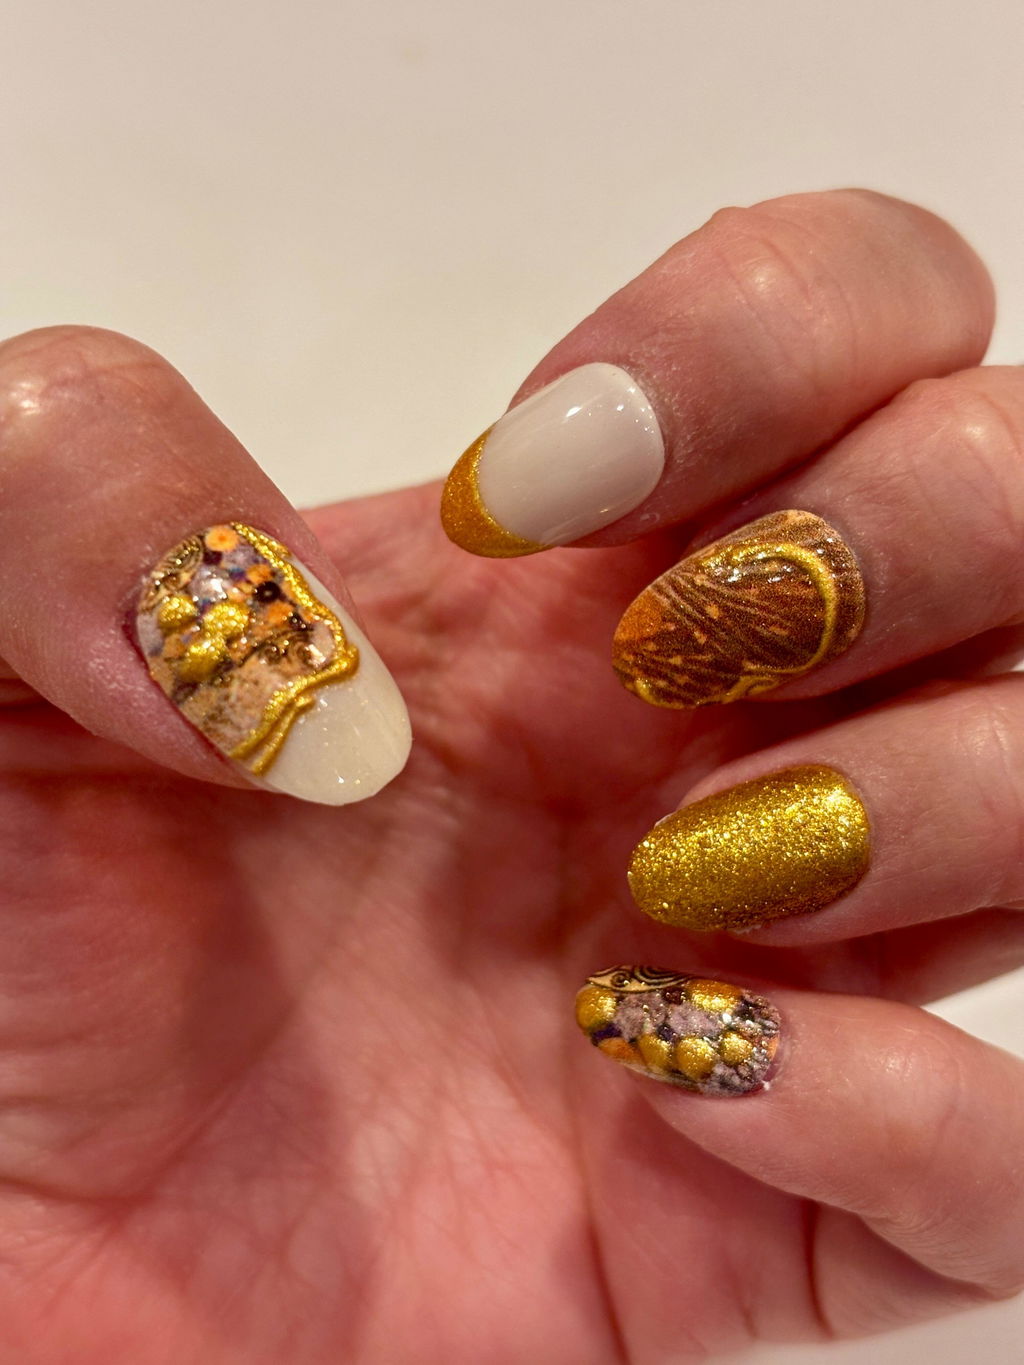
Nail Sticker Designs That Work Over Polish Without Lifting (+ How to Make Them Last)
The Short Answer
Nail stickers work beautifully over polish — as long as your base coat is completely dry, you press firmly from the center out, and you seal everything with a glossy topcoat. Nail prep is the real secret to zero lifting.
Why Nail Stickers Lift (and How to Stop It)
If you've ever peeled a gorgeous nail sticker off your freshly painted nails two days later — still perfectly intact, just no longer on your finger — you already know the frustration. Lifting isn't a design problem. It's almost always a prep and application problem. The good news? It's completely fixable.
Here's what's actually happening: nail stickers need a smooth, non-porous surface to grip. Fresh polish that hasn't fully cured is slightly tacky and flexible, which sounds ideal but actually prevents a clean bond. Oils, moisture, and even tiny air bubbles under the sticker create weak points that peel back from the edges over time.
Once you understand the "why," the fix becomes obvious.
Step 1: Let Your Polish Cure — Really Cure
This is the step most people skip. Your polish may feel dry to the touch in 20 minutes, but it takes a full 24 hours to harden properly. Applying nail stickers over semi-cured polish is the number one cause of lifting. If you're in a hurry, wait at least two to four hours and make sure the surface feels completely hard — not just dry.
Step 2: Prep Your Nail Surface
Before you even open your sticker sheet, swipe each nail with an alcohol pad to remove any residual oils or lotion. This is especially important if you have naturally oily nail beds — a common reason stickers (and press-ons) don't grip the way they should. The alcohol evaporates quickly and leaves a clean, slightly dehydrated surface that stickers love.
Step 3: Apply with Intention
Peel your sticker carefully, position it slightly above the cuticle (not touching skin), and press from the center outward. Work out any air bubbles as you go. Use a cuticle stick or the back of your fingernail to press the edges down firmly — this is where lifting almost always starts.
Step 4: Seal with a Glossy Topcoat
This is your insurance policy. A generous layer of glossy topcoat — applied over the sticker and extended slightly onto the bare nail tip — locks everything in place and creates a smooth, seamless finish. Reapply every two to three days to maintain that sealed edge and extend wear significantly.
The Best Nail Sticker Designs to Layer Over Polish
Not all nail stickers are created equal. Thin, flexible stickers with a clean edge conform better to the nail surface and leave less room for air to creep underneath. Artist-designed stickers with detailed illustrations tend to be printed on a finer film, which means they lay flatter and blend more naturally into your polish color.
Here are some of our favorite designs to layer over a solid base:
Whimsical Character Stickers
Character-based stickers work especially well over a coordinating solid base. Try layering Snoopy or Miffy stickers over a soft white or pastel pink — the character pops, the edges disappear, and the whole look reads as intentional nail art rather than a sticker on top of polish.

Artist-Illustrated Nature Stickers
Fine-line illustrated stickers — think botanical motifs, tiny creatures, and hand-drawn details — are ideal for layering because their thin profile sits flush against the nail. The Lorien Stern Bundle pairs press-on nail sets with Lorien's Natural World Nail Stickers, giving you a ready-made system where the stickers are designed to complement the nail art underneath.

Bold Graphic Stickers Over Neutral Polish
If your base is a clean nude or a soft burgundy, graphic stickers with high contrast — like the character-forward designs in the Celine Kwan Collection Bundle — become the focal point of your manicure. The neutral base disappears and the sticker design reads like painted nail art.

Playful Mixed-Media Sticker Bundles
If you want maximum design options, a multi-artist sticker bundle gives you the most flexibility to mix and match over different polish shades. The Artist Nail Sticker Bundle 1 brings together sticker sheets from Zoe Wodarz, Sirrah Archive, and Lorien Stern — three distinct illustration styles that work over everything from sheer nudes to deep jewel tones.
Pairing Nail Stickers with Press-On Nails
Here's a technique that sidesteps the "over polish" problem entirely while still giving you layered nail art: apply your press-on nails first, then add nail stickers on top of the press-on surface. Because press-ons have a smooth, consistent finish, stickers adhere more predictably than they do over traditional polish — no curing time required, no oil concerns.
This is exactly how our artist bundles are designed to work. The Art You Can Wear Bundle pairs Van Gogh and Matisse-inspired press-ons with a Lorien Stern sticker sheet so you can layer illustrated details directly onto the press-on surface for a truly one-of-a-kind manicure.

The same layering approach works beautifully with the Miffy Dream Bundle — soft pastel press-ons topped with Miffy-themed sticker accents for a look that's equal parts cozy and considered.

Tips for Specific Nail Types
Oily Nail Beds
If your nails tend to be on the oilier side, do a double-cleanse: wipe with an alcohol pad, let it dry completely, then wipe again before applying stickers. Some people also find that applying a thin layer of base coat under their polish — and making sure it's fully cured — creates a better surface for sticker adhesion.
Flat or Low C-Curve Nails
Flatter nail beds can make stickers bow up at the edges rather than conforming to the nail shape. The fix is gentle heat: after pressing the sticker down, hold your fingertip near a warm lamp for a few seconds to slightly soften the sticker film, then press the edges down again firmly. Seal immediately with topcoat while the sticker is still warm and pliable.
Short Nails
On shorter nails, there's less surface area for the sticker to grip — which means edge adhesion matters even more. Cut your sticker slightly smaller than your nail (leaving a tiny gap at every edge) and seal with topcoat that extends past the sticker edge onto the bare nail. This prevents the topcoat from peeling up and taking the sticker with it.
Beginners
Start with smaller accent stickers on one or two nails rather than covering all ten. This gives you a feel for the application technique without the pressure of a full set. Once you've got the press-and-seal method down, scaling up to a full nail sticker look is straightforward.
The Topcoat Trick That Changes Everything
If there's one thing worth repeating, it's this: topcoat is not optional. A good glossy topcoat does three things simultaneously — it seals the sticker edge so it can't catch and peel, it smooths out any slight texture difference between the sticker and the polish, and it adds a layer of protection against everyday wear. Apply it generously, let it dry fully, and reapply every few days. Your nail art will last noticeably longer.
For press-on nail sets, the same principle applies. Our press-ons are designed to be reusable — which means proper care (including sealing any sticker accents with topcoat) helps them maintain their look through multiple wears.
Frequently Asked Questions
Can you put nail stickers over wet polish?
No — and this is the most common mistake. Polish needs to be fully cured (at least 24 hours, or a minimum of two to four hours for a quick application) before you add stickers. Wet or semi-cured polish is flexible and slightly tacky, which prevents a clean bond and causes lifting.
Do nail stickers work over gel polish?
Yes, and gel polish is actually one of the best bases for nail stickers because it cures to a hard, smooth surface. Make sure the gel is fully cured under your lamp, wipe off any tacky inhibition layer with isopropyl alcohol, and apply your stickers as usual. Seal with a gel topcoat and cure again for maximum hold.
Why do my nail stickers keep lifting at the edges?
Edge lifting usually comes down to one of three things: polish that wasn't fully cured, oil or moisture on the nail surface, or skipping topcoat. Make sure you're pressing the sticker edges down firmly with a cuticle stick, and always seal with a glossy topcoat that extends slightly beyond the sticker edge onto the bare nail.
How long do nail stickers last over polish?
With proper prep and a sealed topcoat, nail stickers can last five to seven days over polish. Reapplying topcoat every two to three days and avoiding prolonged water exposure (wear gloves for dishes!) will push that wear time further.
Can I use nail stickers on press-on nails?
Absolutely — and it's one of our favorite techniques. Press-on nails have a smooth, consistent surface that stickers adhere to really well. Many of our artist bundles are designed with this in mind, pairing press-on sets with coordinating sticker sheets so you can layer designs directly on top for a custom, gallery-worthy look.
What's the best topcoat to use over nail stickers?
A glossy, quick-dry topcoat works best. Matte topcoats can sometimes cause stickers to appear cloudy or slightly raised at the edges. Apply in thin, even layers and let each coat dry fully before adding another.
Do I need to size nail stickers like press-on nails?
Nail stickers don't require the same precise sizing as press-ons, but cutting them to fit your nail (leaving a small gap at the edges) will dramatically improve adhesion and longevity. Most sticker sheets include a range of sizes — start with the closest fit and trim with small scissors or nail clippers if needed.