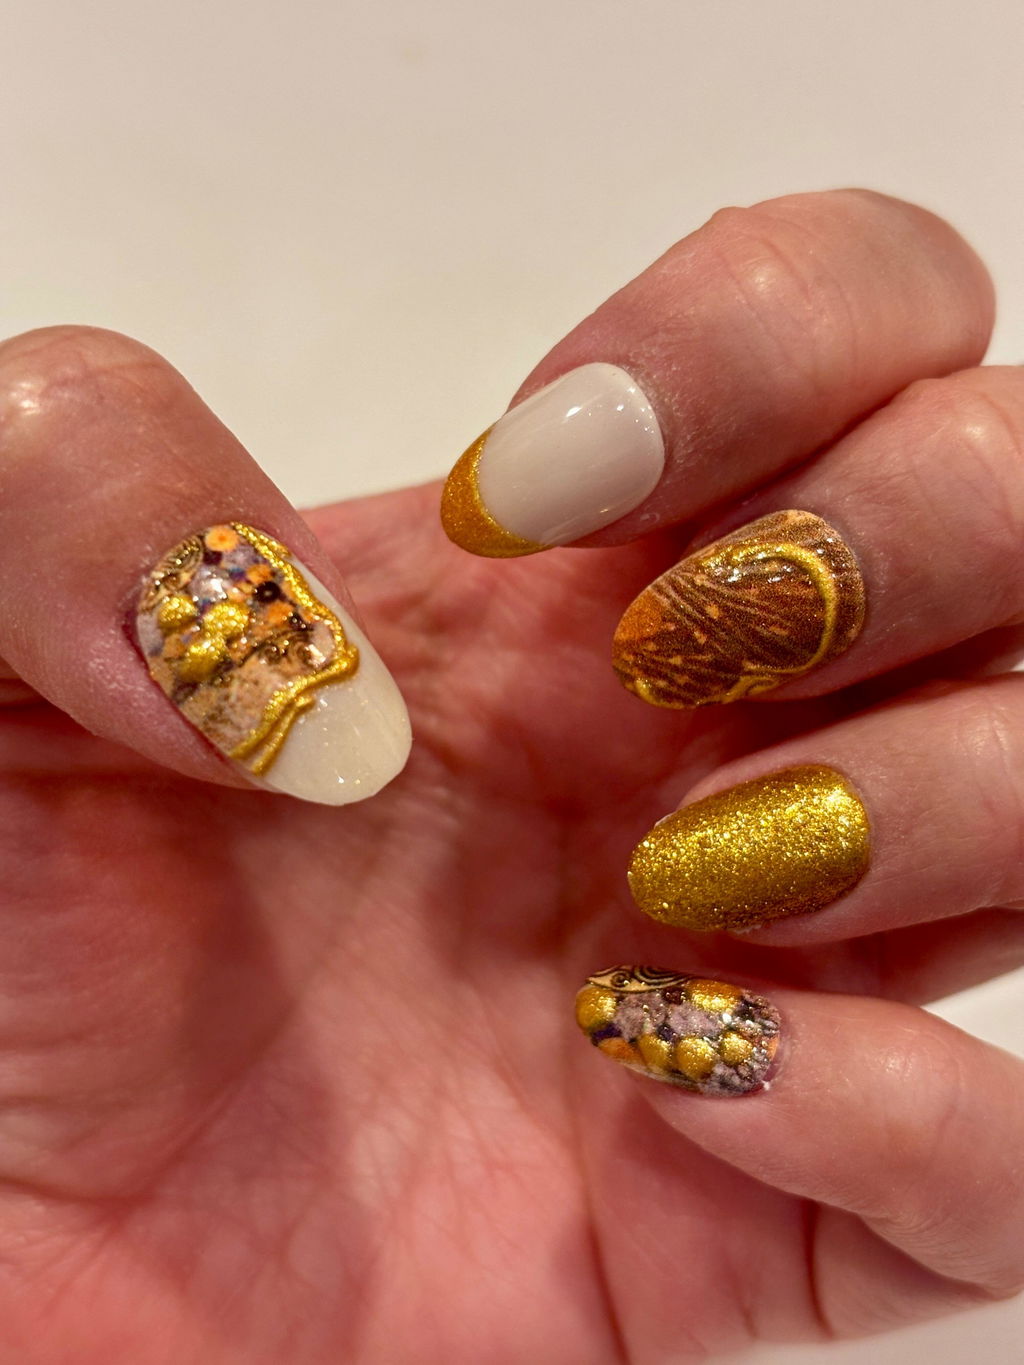
Salon-Quality Nails at Home: Why It's Hard (and How Press-Ons Actually Fix It)
The Real Reason Your At-Home Manicure Never Looks Quite Right
Getting a seamless, salon-quality manicure at home is 100% achievable — the gap between "DIY" and "just walked out of a nail bar" almost always comes down to three things: fit, adhesive, and aftercare. Nail the (pun intended) process and your press-ons can last close to two weeks.
If you've ever peeled off a set after a single day, watched a nail split in half before lunch, or squinted at your hand wondering why the color looks nothing like the product photo — you are not alone, and it is not your fault. These are the most common friction points in the press-on world, and every single one of them is fixable.
Here's exactly what's going wrong and how to fix it, so your next manicure looks like you paid for it.
Problem #1: The Fit Is Off and It Shows
The number-one reason a press-on manicure looks "fake" is poor fit. When a nail is even slightly too wide, it lifts at the edges. Too narrow and there's a visible gap against your skin. Either way, the illusion breaks instantly.
How to size properly (before you even open the glue)
- Lay out all sizes first. Most sets include 10–12 sizes. Before applying anything, hold each nail against your natural nail and find the one that covers your nail bed edge-to-edge without touching your skin.
- Go slightly smaller if you're between sizes. A nail that's a touch narrow looks far more natural than one that's too wide and starts lifting at the sides.
- Check the curve, not just the width. A nail that matches your width but doesn't follow your natural curvature will still pop off early. Press it flat against your nail and look for gaps underneath.
- Do all ten fingers before applying any. Line them up in order. This five-minute step alone is the difference between a manicure that lasts a day and one that lasts a week-plus.
If you have wider nail beds and struggle to find a flush fit in standard sets, know that this is one of the most-requested improvements in the press-on world — and a well-curated set with genuine size variety makes all the difference.
Problem #2: The Adhesive Tabs Aren't Enough
Here's a truth the box doesn't always make clear: the adhesive tabs or glue dots included in most press-on kits are designed for short-term or temporary wear — think a night out, a weekend event, or a quick refresh. They are not engineered for two-week salon-length hold.
If you want your nails to last, nail glue is non-negotiable.
Adhesive tabs vs. nail glue: when to use each
- Adhesive tabs: Great for events where you want to remove the nails cleanly the same day or the next morning. They protect your natural nail and allow for easy, damage-free removal.
- Nail glue: The move for longer wear. Apply a thin layer to both the press-on and your natural nail, wait five seconds, then press firmly for 30–60 seconds. The bond is significantly stronger and more water-resistant.
- UV nail glue (the upgrade): Some nail enthusiasts swear by UV-cured nail glue for the closest thing to a salon gel bond at home. If you're chasing that two-week benchmark, it's worth exploring.
The Peanuts On-the-Go Kit and the Faux Nail Fix-It Kit include nail glue alongside a file and cuticle pusher — so you have everything you need for a proper application and quick repairs on the go. Always keep a backup tube in your bag. A lifted nail caught early can be re-glued in seconds; ignored for a day, it's gone.
Problem #3: Thin Nails That Split Before the Week Is Out
Splitting and cracking is the durability complaint that shows up most consistently across press-on reviews. It usually comes from one of two things: the material is too thin to begin with, or the nail was stressed at a weak point (often the tip or a raised design element) before the adhesive had time to fully cure.
How to protect your nails from splitting
- Let the glue cure fully. After pressing down, hold for a full 60 seconds. Don't test the bond by flexing the nail immediately — give it 10–15 minutes before doing anything with your hands.
- Avoid using your nails as tools. Opening cans, picking at stickers, prying lids — these are the fastest ways to stress a nail at the tip. Use a pen cap, a coin, anything else.
- File the tips gently after application. If the press-on is slightly longer than your ideal length, file downward (not side to side) to reduce stress on the tip.
- Look for thicker, flexible material. Quality press-ons should have enough body to resist bending under light pressure but enough flexibility to conform to your nail bed. If a nail feels paper-thin out of the box, that's a material quality issue — not a you problem.

Problem #4: The Color Looks Different in Real Life
You order a set based on a gorgeous product photo. It arrives and the shade is darker, more orange, or lighter than you expected. This is one of the most trust-eroding experiences in online beauty shopping — and it's worth knowing why it happens and how to shop smarter.
Screen calibration, studio lighting, and photo editing all affect how a nail color renders on your device. A few ways to get a truer read:
- Look for lifestyle photos (nails on actual hands in natural light) rather than relying solely on studio shots.
- Check the product description for tone cues — words like "dreamy marbled tones," "deep crimson," or "soft blush" give you more accurate color context than the image alone.
- Read recent reviews and look for customer photos when available.
At Never Have I Ever, the product descriptions are written to give you a genuine sense of the palette — not just a name. When we say the Monet Water Lilies set features "dreamy marbled tones and delicate pearl accents," that's a deliberate attempt to set an accurate expectation, not marketing fluff.

Problem #5: The Design Looks Amazing on One Nail and Pixelated on the Rest
Some press-on sets advertise raised or 3D gel designs but only deliver them on a handful of nails in the set — the rest use a flat printed version that can look noticeably different up close. This is a real inconsistency in the category and something to look for when you're shopping.
What to check before you buy:
- Does the product description specify which nails in the set feature 3D or raised elements?
- Are there close-up photos showing multiple nails from the set, not just the hero nail?
- Does the brand describe the design as "mix-and-match" across the set, which signals intentional variety rather than inconsistency?
The best sets — like the artist-designed collections here at Never Have I Ever — lean into intentional design variation. Each nail in a set tells part of a larger story, so the variety feels cohesive rather than like a quality control miss. The Art You Can Wear Bundle, for example, pairs Van Gogh and Matisse-inspired designs where the variation across nails is part of the artistic concept.

The Step-by-Step Application That Actually Gets You Salon Results
Most people skip at least two of these steps. Don't.
- Prep your natural nails. Wash your hands, push back your cuticles, and lightly buff the surface of each nail. This removes oils that break down adhesive. Wipe with rubbing alcohol or nail prep solution and let dry completely.
- Size every nail before applying any. Line them up in order across your workspace.
- Apply glue to both surfaces. A thin layer on your natural nail and a thin layer on the press-on. Wait five seconds for the glue to get slightly tacky.
- Apply from the cuticle down. Start at the base of your nail (near the cuticle), press down, and rock the nail toward the tip to push out air bubbles. Press firmly for 30–60 seconds.
- Clean up the edges. Use a cuticle stick to press down any edges and remove any glue that seeped onto your skin before it dries.
- Let everything cure. Wait 10–15 minutes before washing your hands or doing anything that stresses the nails.
- Avoid water for the first hour. Water is the enemy of fresh adhesive. The longer you can stay dry after application, the stronger the bond.
How to Make Your Press-Ons Last (and Reuse Them)
Reusability is one of the most underrated features of quality press-ons — and one of the most misunderstood. Yes, you can wear the same set multiple times. Here's how to make it happen:
While wearing
- Wear gloves when washing dishes or doing heavy cleaning. Prolonged water exposure weakens the bond faster than anything else.
- If a nail starts to lift at the edge, re-glue it immediately rather than waiting for it to pop off completely.
- Avoid picking at the edges — this is how nails break rather than pop off cleanly.
Removal
- Soak your nails in warm water for 10–15 minutes to loosen the adhesive.
- Gently rock the nail side to side from the base — never pull straight up from the tip.
- If there's resistance, soak longer. Forcing removal is how nails break and how natural nails get damaged.
Cleaning for reuse
- Remove any old glue residue from the inside of the press-on using a cuticle stick or gentle scraping.
- Wash the nails gently with mild dish soap and a soft brush to remove oils and residue.
- Let them dry completely before storing flat in their original tray.
- When you're ready to reapply, treat them exactly as you would a fresh set — prep, size, glue, cure.

The Sets Worth Starting With
If you're new to press-ons or rebuilding your confidence after a bad experience with another brand, here are a few Never Have I Ever sets that make the process genuinely easy:
For a classic, elegant look
The Monet Bridge Over a Pond of Water Lilies Almond Press-On Nails give you something that reads as refined and intentional — the kind of manicure people ask about. Romantic botanical tones with gold linework that looks hand-painted, not printed.

For a bold, statement manicure
The Hokusai Great Wave Square Press-On Nails are the kind of set that stops conversations. Bold blues, flowing lines, and a design that's instantly recognizable — but still wearable for everyday.

For the best value and variety
The Masters Bundle pairs Frida Kahlo and Henri Matisse-inspired designs in one set — two completely different aesthetics, both designed to the same quality standard. It's also the smartest way to test which shape and style works best for your nail beds before committing to a single set.

Frequently Asked Questions
How long should press-on nails actually last?
With adhesive tabs, expect 1–3 days of wear — they're designed for temporary use. With nail glue and proper prep (clean, buffed, oil-free nails), most quality press-ons will last 7–14 days. The two-week benchmark is achievable at home when you follow the full prep and application process.
Why do my press-on nails keep popping off?
The most common reasons are oily nail beds (always wipe with alcohol before applying), using adhesive tabs instead of nail glue, poor size fit (nails that are too wide lift at the edges), or exposing the nails to water too soon after application. Address all four and early lifting becomes rare.
How do I find the right size press-on nail?
Hold each size against your natural nail without applying glue. You want the press-on to cover your nail bed from edge to edge without touching the skin on either side. If you're between sizes, go slightly smaller — a nail that's a touch narrow looks more natural than one that's too wide and starts to lift.
Can I reuse press-on nails?
Yes — quality press-ons are designed to be reused multiple times with proper care. Remove them gently by soaking in warm water, clean off old glue residue, wash with mild soap, dry completely, and store flat. When you reapply, treat them like a fresh set: prep your natural nails, use fresh glue, and follow the full application process.
Is nail glue better than adhesive tabs for press-ons?
For longer wear (a week or more), nail glue provides a significantly stronger bond than adhesive tabs. Tabs are better for short-term or temporary wear when you want easy, damage-free removal the same day. For events, travel, or everyday wear where you want your manicure to last, nail glue is the right choice.
Why do my press-on nails split or break so quickly?
Splitting usually comes from thin nail material, using your nails as tools (opening cans, picking at things), or stress on the tip before the glue has fully cured. Let your nails cure for 10–15 minutes after application, avoid using them as tools, and look for sets made from thicker, more flexible material for better durability.
How do I remove press-on nails without damaging my natural nails?
Soak your nails in warm water for 10–15 minutes to loosen the adhesive. Then gently rock each nail from side to side starting at the base — never pull straight up from the tip. If you feel resistance, soak longer. Forcing removal is the main cause of natural nail damage with press-ons.